Select the file plan to search. If not selected, all authorized file plan trees will be searched.
The data such as Code, Name, Date or Barcode of the Entity shall be searched or the data such as Document Direction, Detsis No, Institution or Unit of the Record shall be searched also. If there are specific indexed fields for the selected file plan, this metadata will also appear on the search screen. It is also possible to search through these metadatas.
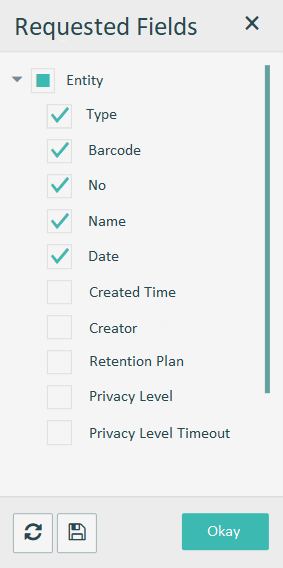
We can select the fields that we want to bring in the search result. Save selection with this button: Clear selection with this button:
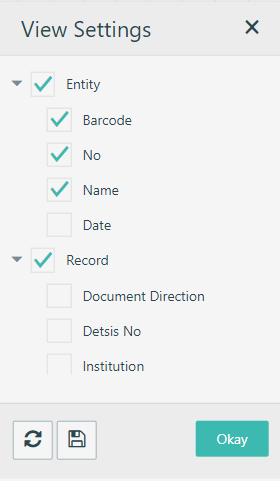
The fields to appear on the search screen can be set. Unused fields can be hidden to save space in the search panel. Save selection with this button: Clear selection with this button:
After the search criteria are completed, we can search by clicking the Search button.
We can clear the search criteria by clicking the Reset button.
Grid Settings
Forward and backward buttons are used for fast navigation between folders and documents.
Change the view mode of the grid (Thumbnail)
It shows thumbnail of entities.
All documents on the grid can be downloaded as a zip package.
It hides empty columns on the grid.
It counts page counts of search results.
It transfers search results to Excel documents by clicking that button.
It hides unwanted fields on the grid.
Saved grid settings can be reset to default by clicking this button.
Properties such as column widths, column rankings, the order in which the results will be displayed and grouping by field can be saved. These properties are assumed by default for the next call. For example, if we save the grid settings by sorting them in the “Date” field, the results are always shown in the “Date” field in our next searches.
Used to add a new parent entity. For example, if a folder is to be added, this button is used, but if a document is to be added to a folder, first the related folder is found and the “+ Add Entity” option is selected from the right-click menu.
Right-Click Menu(Folder)
This selection is used to add a folder, a new document or a group of a document.
Used to move to a parent entity of the document. This can often be the folder as well as the document group.
Press to cut a folder for transport.
Press to paste the folder which has cut for transport.
It shows the location belongs to the folder.
It downloads folder with relationships.
It adds Access control to the folder.
It views the history of the folder.
It goes to shortcuts. (If you created a shortcut for the folder and pasted it, you can go to the shortcut)
It goes to the source. (If you pasted a shortcut to this selected folder, System will let you go to the that folder which you pasted shortcut.)
It creates a shortcut of selected folder.
It pastes the shortcut which you created.
Right – Click Menu (Component)
It displays the document on the right side of the screen.
It displays the document in a new window.
It quickly adds new component(s) to the document.
It displays sub-data of the documents If it is available.
It adds a new sub-data to the document.
It goes to the upper entity of the document. This can be aggregate or folder.
It cuts the folder for transport.
It pastes the document which cut into an entity.
It shares the document as mail to users who have registered e-mail address.
It opens shortcut options for the document. It is the same as the folder shortcut options.


 The fields to appear on the search screen can be set. Unused fields can be hidden to save space in the search panel. Save selection with this button: Clear selection with this button:
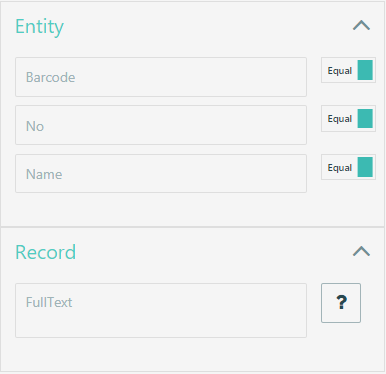
 After the search criteria are completed, we can search by clicking the Search button.